
I found this recipe from the internet for a good fermented pickle from a woman who claims that this is the recipe that can rival or better Bubbie’s pickles. Her video is pretty decent but the written recipe leaves alot to be desired so I’ve transcribed it with modifications.
Keep in mind that this is work-in-progress until the pickles are tasted and judged. Hopefully, we should have some initial results on February 11, 2024!
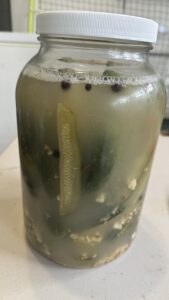
Update: End of 1st week after pickles have been refrigerated. The 3 weeks in the brine, I believe, is critical to a great tasting pickle. I tried a spear 1 week in and it was much better than after one I tried after 3 days. So technically, these could be ready by 3 or 4 days, however, if you want them done right, wait the 3 weeks.
Update: I just tried the pickles after waiting patiently for 3 weeks. They really do taste like Bubbie’s. They’ve stayed crisp and I imagine they’ll stay crisp as long as they are in the jar refrigerated. I think next time I’ll try whole pickles….that is if I can fit as many pickles as i did with the spears. Also, I’m debating if I have overdone it with the garlic. I used 2 heads (not as written below), given that the original recipe used dried chopped garlic and dried is usually stronger than fresh. Next time, I could probably get away with 1 head of garlic, however, I have no regrets using 2 heads on this recipe.

Copycat Bubbies Pickles
Equipment
- 1 1 Gallon Wide Mouth Mason Jar, Clear Footnote 1
- 1 Stainless Steel Fermenting Kit for Wide Mouth Mason Jars Footnote 2
- 1 Extra wide mouth lids Footnote 3
Ingredients
- 1 packet Cutting Edge Cultures Vegetable Starter Culture Footnote 4
- 2 tsp sugar white, granulated
- 1 cup water filtered
- 3-4 lbs cucumbers prefer pickling
- 4 cloves garlic this feels fairly light. I may double this to 8 cloves. never enough garlic in a recipe like this.
- 6 tbsp salt kosher
- 3 tbsp dill seed whole
- 2 tbsp coriander seeds whole
- 1 tsp mixed peppercorns kosher
- 1 tsp juniper berries
- 1 tsp fennel seeds
- ½ tsp red pepper flakes
- 1 tsp mustard seeds this is still an unknown at this point. Many other recipes use mustard seeds in their recipes. i will be using this
Instructions
Equipment Preparation
- Drill a ⅓ inch hole in the center of one of the plastic lids in order to fit the rubber seal in the center. Be careful not to make the hole too wide or you will destroy that lid.
- Insert gas valve chamber in the center
Pickle Preparation
- Cut (or leave whole…your preference) the pickling cucumbers to your preferred shape and place in the pickling jar3-4 lbs cucumbers
- Chop the garlic cloves finely and put in the pickling jar along with the cucumbers4 cloves garlic
- Make the spice mix. Mix the salt, dill seeds, coriander seeds, peppercorns, juniper berries, fennel seeds, and red pepper flakes6 tbsp salt, 3 tbsp dill seed, 2 tbsp coriander seeds, 1 tsp mixed peppercorns, 1 tsp juniper berries, 1 tsp fennel seeds, ½ tsp red pepper flakes, 1 tsp mustard seeds
- Pour the spice mix into the pickling jar
- Make the starter culture. Mix water, sugar and starter culture1 packet Cutting Edge Cultures Vegetable Starter Culture, 2 tsp sugar, 1 cup water
- Pour the starter culture into the pickling jar
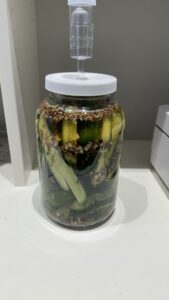
- Fill the pickling jar with filtered water and close with the pickling kit jar tops
- Add water to the valve
- Place jar in a space that does not have any direct sunlight for 3 days
- Place remove pickling kit jar top and place in refrigerator with a standard jar top for 3 weeks (21 days)
- Eat (and enjoy!) your pickles
Notes
The fermentation process really happens in 2 phases. The first phase is where the lactobacilli bacteria (the good bacteria and salt tolerant) start to kill of the bad bacteria with the help of all that salt you added to it. This is usually by the end of day 1. The second phase is where that bacteria start going to work on the cucumbers…eating the sugars….multiplying…and making lactic acid, which is the preservation agent for your pickles. This happens most actively on days 2-3 or 4 (add an extra day if your house is particularly colder (mid to upper 60s).
